Situation introduction:
My HMP5000 was upgraded online on the evening of March 5th. After the upgrade was completed, the player automatically restarted, and then stopped at the LOGO screen. Finally, there was no signal, and then it was restarted and stopped at the LOGO screen. Repeatedly, as everyone encountered, using the SD card root directory and U disk root directory at the same time put install.img + strong brush logo file, there is still no response, U disk light does not shine. Before upgrading the firmware on the player 2012.11.25 Philips HMP5000 Hong Kong version jailbreak firmware.
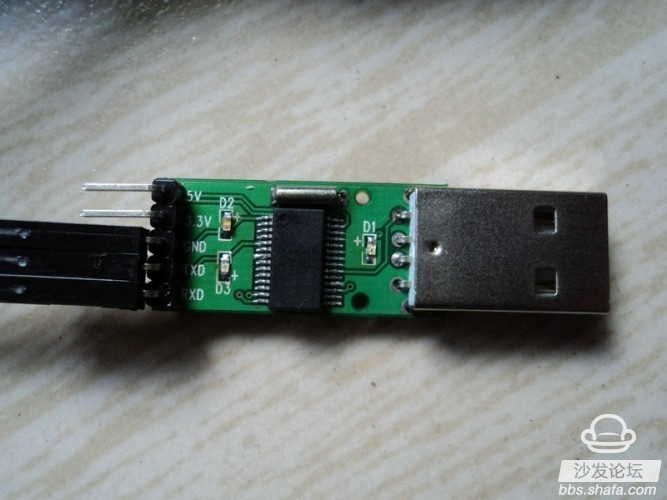
March 7 to get Philips in Chengdu to repair, the maintenance staff is 2, took a U disk, copy the install.img to the U disk, and then power, and then tell me to wait ten minutes. I thought it was really a matter of time. I had been waiting for nearly half an hour and the player had been repeatedly restarted there. He told me to wait, and said that this is in the brush machine (in fact, U disk did not flash, no reaction at all), if you have not been able to do so, only the replacement of the motherboard. After reading my invoice, I said that I had already passed the insurance, and the replacement of the motherboard cost more than 300 yuan. I said, how do you not use TTL small board flashing machine. He said that there is no such thing. I think if you really spend more than 300 yuan for the motherboard, you might as well go back and try it yourself. On the evening of March 5th, I bought a small TTL board on the Internet. The Chengdu Chenghuang Temple merchants, because I was in Chengdu, I was close to it, and the freight was low and the time was fast. 6.5 yuan TTL plate + 6 yuan freight yesterday, I got it back from the Philips repair point. First from the business to the URL of the driver, plug in the computer to find the hardware, and use a multimeter to measure the voltage of the TTL small board, are normal.
Since last night the company worked overtime until 8pm, it did not have time to try. If you go home earlier today, you can't wait to get the tools ready. Two screwdrivers (one large and one small cross), one electric iron, and one USB flash drive (the firmware in the U disk was copied from Philips' previous official firmware, and there is a problem with the new official firmware. The old one is used first).
The first step, disassemble.
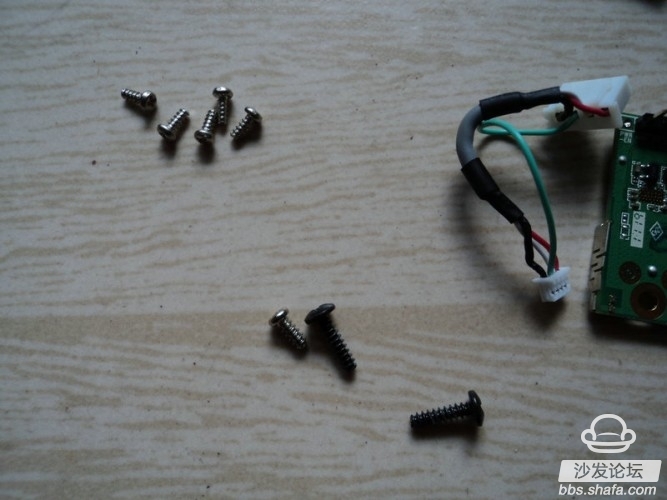
1. Unscrew the two black screws that you can see with a screwdriver. After this step is complete, you can open the shell of the player.
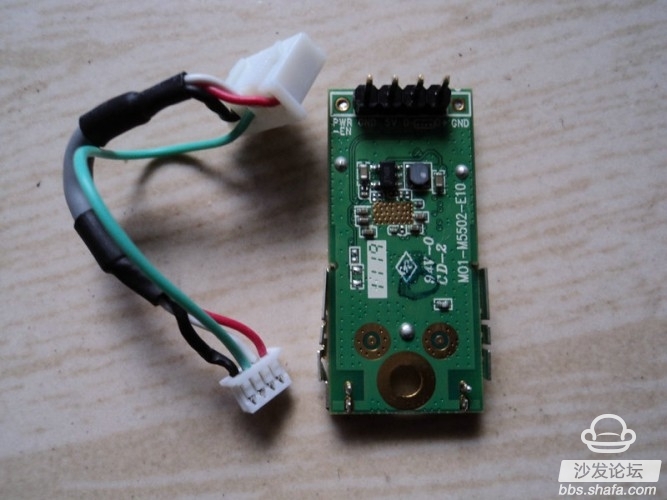
2. Remove the WIFI module and remove the WIFI cable. Remove the WIFI cable from the motherboard and set it aside.
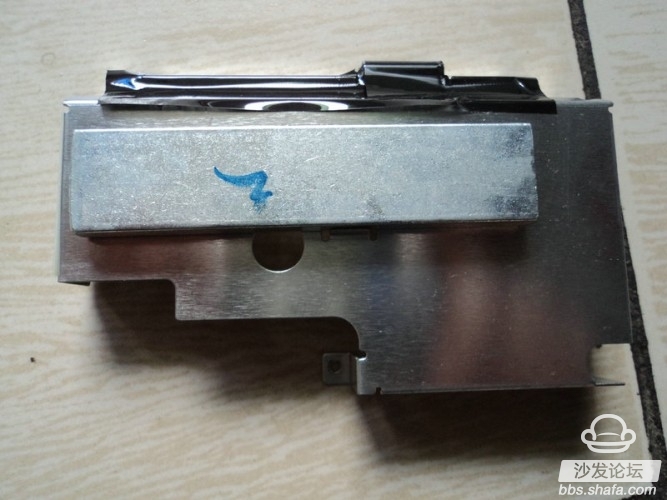
3. Remove all the screws on the main board. There are a total of five screws. Remove the metal shield cover after it is taken.
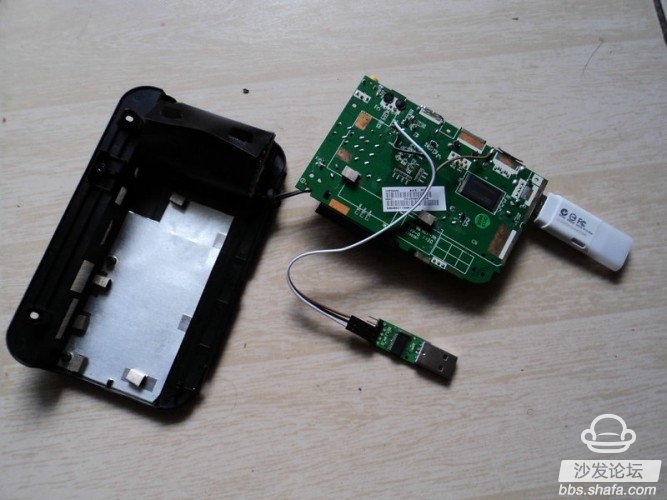
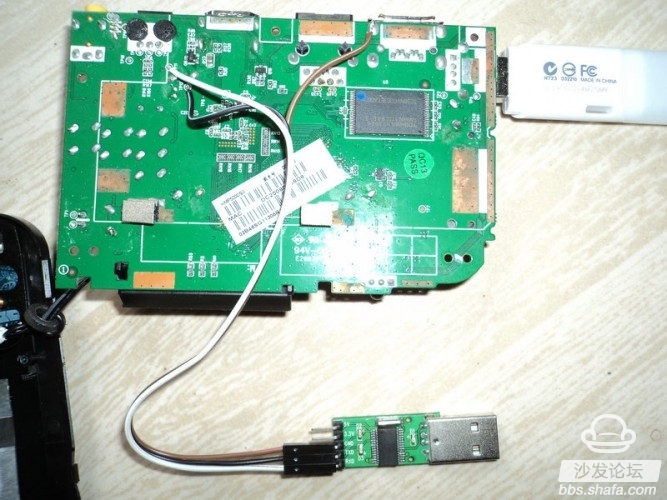
4. Take the motherboard out of the backplane. TP11 and TP12 can be found on the back of the motherboard. GND can find a large solder joint next to the ESATA interface.


The second step, Brush. (I plug the HMP5000 power plug into the switchboard with the switch, so it is more convenient to power off and power on)
1. Power off the HMP5000 and dial the small TTL board from the computer's USB port. Make sure that the electric iron is disconnected when welding.
2. Use electric ferrochrome to solder the GND of the TTL plate to the GND of the HMP5000. Connect the RXD of the TTL plate to the TP11 of the HMP5000. Connect the TXD of the TTL plate to the TP12 of the HMP5000. Remember to only connect these three lines, do not receive 5V or 3.3V power supply, I used a multimeter to play TP10, the player comes with a voltage of about 5.3V.
3. Copy the HMP5000 firmware install.img to the root directory of the USB flash drive and insert the USB flash drive into the USB port of the HMP5000.
4. Insert the TTL board into the USB port of the computer, open the HyperTerminal, and select the COM port of the TTL board (if the TTL board has been installed).
5. Turn on the HMP5000 power supply, click on the HyperTerminal dial button, and then after the code scrolls, turn off the player. This step is mainly to confirm whether the communication is normal and establish a connection.
6. First press the TAB key, then open the player power, see the U disk light flashes when you can release the TAB key, then automatically brush U disk root directory firmware install.img.
The third step, brush machine is completed. After the completion of the U disk will not flash, while waiting a little longer, HMP5000 power light will turn red, indicating that it has been automatically shut down. You can safely disconnect the HMP5000 at this time. After connecting the monitor and then powering on, you can enter the system normally. The previous welding line can be removed, and the main board and WIFI can be installed and put back into the box.
Finally, I still did not give up and wanted to see what is wrong with Philips' latest firmware. Then I replaced the install.img in the U disk with the 2013-1-31 firmware and chose the USB upgrade. This time the upgrade is complete. The player automatically restarts and enters the system. Compared with the original, except for a slight change in the background and icons, others do not see any change. It is still the first time to power off for 30 seconds (this is really a mentally handicapped move. After each power-up, the remote controller must be pressed within 30 seconds). It is still not possible to sort by name in the folder below.
In summary, using so many versions, or "2012.11.25 Philips HMP5000 Hong Kong Edition jailbreak firmware" this version is best used. I hope that this latest firmware will also be added to other platforms soon. The number of Chinese is really bad, and it will be charged. After a while, it will be painted in.
My HMP5000 was upgraded online on the evening of March 5th. After the upgrade was completed, the player automatically restarted, and then stopped at the LOGO screen. Finally, there was no signal, and then it was restarted and stopped at the LOGO screen. Repeatedly, as everyone encountered, using the SD card root directory and U disk root directory at the same time put install.img + strong brush logo file, there is still no response, U disk light does not shine. Before upgrading the firmware on the player 2012.11.25 Philips HMP5000 Hong Kong version jailbreak firmware.
March 7 to get Philips in Chengdu to repair, the maintenance staff is 2, took a U disk, copy the install.img to the U disk, and then power, and then tell me to wait ten minutes. I thought it was really a matter of time. I had been waiting for nearly half an hour and the player had been repeatedly restarted there. He told me to wait, and said that this is in the brush machine (in fact, U disk did not flash, no reaction at all), if you have not been able to do so, only the replacement of the motherboard. After reading my invoice, I said that I had already passed the insurance, and the replacement of the motherboard cost more than 300 yuan. I said, how do you not use TTL small board flashing machine. He said that there is no such thing. I think if you really spend more than 300 yuan for the motherboard, you might as well go back and try it yourself. On the evening of March 5th, I bought a small TTL board on the Internet. The Chengdu Chenghuang Temple merchants, because I was in Chengdu, I was close to it, and the freight was low and the time was fast. 6.5 yuan TTL plate + 6 yuan freight yesterday, I got it back from the Philips repair point. First from the business to the URL of the driver, plug in the computer to find the hardware, and use a multimeter to measure the voltage of the TTL small board, are normal.
Since last night the company worked overtime until 8pm, it did not have time to try. If you go home earlier today, you can't wait to get the tools ready. Two screwdrivers (one large and one small cross), one electric iron, and one USB flash drive (the firmware in the U disk was copied from Philips' previous official firmware, and there is a problem with the new official firmware. The old one is used first).
The first step, disassemble.
1. Unscrew the two black screws that you can see with a screwdriver. After this step is complete, you can open the shell of the player.
2. Remove the WIFI module and remove the WIFI cable. Remove the WIFI cable from the motherboard and set it aside.
3. Remove all the screws on the main board. There are a total of five screws. Remove the metal shield cover after it is taken.
4. Take the motherboard out of the backplane. TP11 and TP12 can be found on the back of the motherboard. GND can find a large solder joint next to the ESATA interface.
The second step, Brush. (I plug the HMP5000 power plug into the switchboard with the switch, so it is more convenient to power off and power on)
1. Power off the HMP5000 and dial the small TTL board from the computer's USB port. Make sure that the electric iron is disconnected when welding.
2. Use electric ferrochrome to solder the GND of the TTL plate to the GND of the HMP5000. Connect the RXD of the TTL plate to the TP11 of the HMP5000. Connect the TXD of the TTL plate to the TP12 of the HMP5000. Remember to only connect these three lines, do not receive 5V or 3.3V power supply, I used a multimeter to play TP10, the player comes with a voltage of about 5.3V.
3. Copy the HMP5000 firmware install.img to the root directory of the USB flash drive and insert the USB flash drive into the USB port of the HMP5000.
4. Insert the TTL board into the USB port of the computer, open the HyperTerminal, and select the COM port of the TTL board (if the TTL board has been installed).
5. Turn on the HMP5000 power supply, click on the HyperTerminal dial button, and then after the code scrolls, turn off the player. This step is mainly to confirm whether the communication is normal and establish a connection.
6. First press the TAB key, then open the player power, see the U disk light flashes when you can release the TAB key, then automatically brush U disk root directory firmware install.img.
The third step, brush machine is completed. After the completion of the U disk will not flash, while waiting a little longer, HMP5000 power light will turn red, indicating that it has been automatically shut down. You can safely disconnect the HMP5000 at this time. After connecting the monitor and then powering on, you can enter the system normally. The previous welding line can be removed, and the main board and WIFI can be installed and put back into the box.
Finally, I still did not give up and wanted to see what is wrong with Philips' latest firmware. Then I replaced the install.img in the U disk with the 2013-1-31 firmware and chose the USB upgrade. This time the upgrade is complete. The player automatically restarts and enters the system. Compared with the original, except for a slight change in the background and icons, others do not see any change. It is still the first time to power off for 30 seconds (this is really a mentally handicapped move. After each power-up, the remote controller must be pressed within 30 seconds). It is still not possible to sort by name in the folder below.
In summary, using so many versions, or "2012.11.25 Philips HMP5000 Hong Kong Edition jailbreak firmware" this version is best used. I hope that this latest firmware will also be added to other platforms soon. The number of Chinese is really bad, and it will be charged. After a while, it will be painted in.