**1. 220V to 12V Power Supply Circuit Diagram**
The circuit diagram is shown below, which includes several key stages: step-down, rectification, filtering, and voltage regulation.
The first stage involves stepping down the 220V AC input to approximately 14V using a transformer with a turns ratio of around 15.7. This is essential to bring the voltage to a level that can be safely processed by the rest of the circuit.
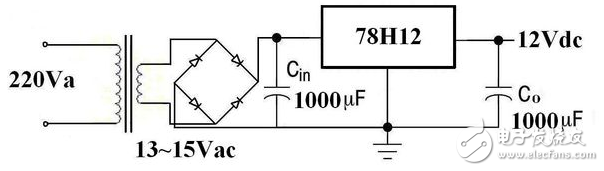
Next, a bridge rectifier made up of four 1N4000 series diodes (such as 1N4001 to 1N4007) is used to convert the 14V AC into a pulsating DC voltage. The peak voltage after rectification will be approximately 18V, depending on the input waveform.
After rectification, a large electrolytic capacitor (Cin) is connected to smooth out the ripple. It should have a voltage rating of at least 25V to handle the expected voltage fluctuations. The operating voltage difference for the 7812 regulator is set to 2V or more, so the capacitor must also account for possible 10% variations in the grid voltage and a small amount of ripple (around 1V).
The voltage regulation stage uses a linear regulator like the 7812, which converts the fluctuating DC voltage (around 18V) into a stable 12V DC output. This ensures consistent power delivery to the connected devices.
To prevent potential self-oscillation caused by the 7812 during operation, an output filter capacitor (Co) is added. This capacitor helps stabilize the output and improve overall performance. Its voltage rating should be no less than 16V.
If higher current is required, a high-current version such as the 78H12 can be used instead of the standard 7812 (which provides 1A). In cases where lower current is sufficient, the values of Cin and Co can be reduced accordingly.
Have you seen the 220V to 12V regulated power supply circuit? Do you want to try building your own DC power supply? Let me guide you through the process.
**2. How to Build a 220V to 12V DC Power Supply**
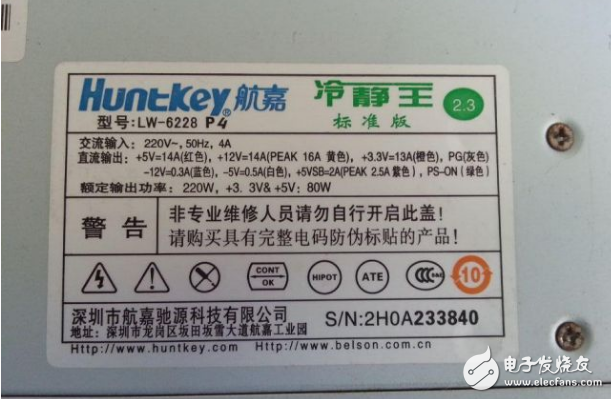
Step 1: Prepare a power supply unit. You can either use an old one or purchase a basic model from the market. These are usually very affordable, costing around 20 yuan. If you don’t want to go to the store, you can take apart an old desktop power supply. Check the labels on the wires to understand their functions.
Most genuine power supplies have yellow wires for 12V output, black wires for ground, and green wires for the power-on signal. These markings make it easier to identify the correct connections.
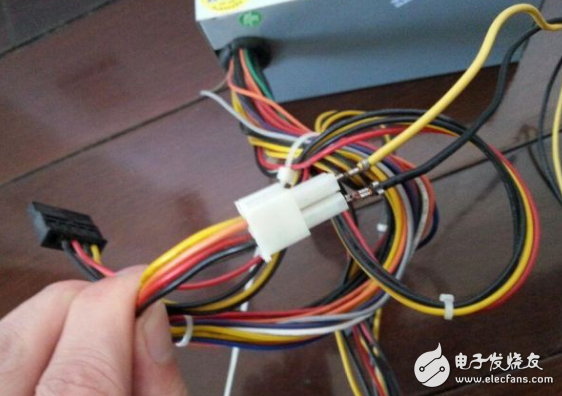
Step 2: Find some small wires. A flat cable should fit perfectly into the connectors. I didn’t feel like going out, so I used other cables to make the necessary connections.
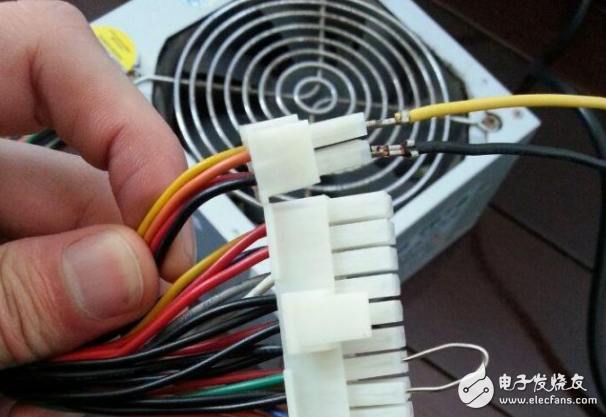
Once all the components are properly connected and tested, your 220V to 12V DC power supply should be ready to use. This simple project is great for learning about power electronics and can be customized based on your specific needs.
FRP Pultruded Profiles,frp profiles,grp pultruded profiles,frp pultruded sections,pultruded profile
Hebei Dingshengda Composite Material Co., Ltd. , https://www.frpdsd.com